

After researching if wheel spacers were dangerous or not, I found out they are not. Due to some reasons why people find them dangerous was because of the following: Cheap spacers, lack in torquing the studded spacers, no center core, not putting extended studs.
People say that your wheel bearings will get damaged with spacers, that is true, same goes for people who are running aggressive wheel setups on their cars WITHOUT spacers. Our cars came with weak offsets for a reason, same goes with the mugen GPS or even HFP rims for our wheel bearings are designed for those kind of OEM rims.
Also putting wheel spacers on will be your last resort IF you cant find the right specs in rims you wanted (the one want that'll be aggressive) and wanting your wheels to look aggressive but do not have the extra money to sell your current rims.
and the other reason why ppl put them on is to clear out the inner wheel from hitting the struts (if running modified suspension) and also to clear brakes. (evos put them on the clear out their brembos)
The spacers I recommend are the ones that have studs pressed on them already and make sure the spacers you'll be getting have center cores (with the correct sizing you have for your rims, stock is 64.1mm) and as far as for brands I would go for Eibach(Germany), H & R(Germany), Ichiba II (JDM), or Project kics. but make sure they have a CENTER CORE! I cannot stress how important it'll be since theres already enough stress and the amount of friction going onto the studs, with the center core. Wheel spacers are very safe if they are torqued right and have enough threads on the studs. The studs are only in tensile force, not shear. The coefficient of friction between the wheel/spacer/hub is what transfers the power to the ground, not through the studs. As long as you can provide the adequate clamping force safely, the spacers will be perfectly safe.
Without further a due lets get started.
What is needed
![Image]()
-Pair of Spacers (I used 20mm Ichiba II)
-Center core 64.1mm (if spacers did not come with one, please get one for the model spacer you bought)
-Hub Centric Rings (I'm running Aftermarket rims, so I got 64.1mm to 72.62mm)
-Anti-Seize Lubricant (prevents corrosion and permits easy disassembling) Also do not go to Home Depot, which was closer to my house since they might not know what it is, and they do not have it
-Cross Wrench/torque wrench or whatever you use to tighten/untighten your lugnuts.
-Sand paper
![Image]()
![Image]()
What the pressed studded spacers look like with center cores and hubcentric rings
![Image]()
![Image]()
![Image]()
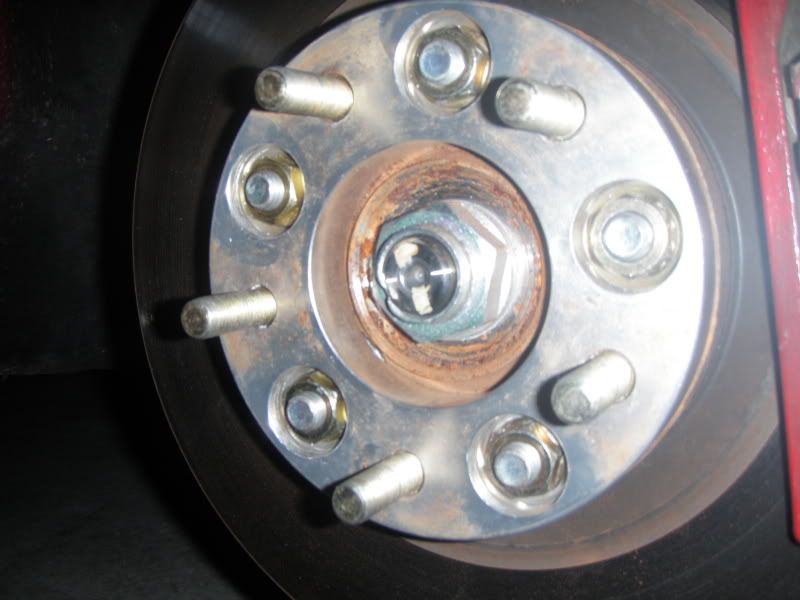
After you jacking up your car, and taking off the wheel. and you can see the rust.
![Image]()
Sand them down first.
![Image]()
and clean it afterwards
![Image]()
next you put the anti-seize lubricants on the studs.
![Image]()
![Image]()
next you put the lugnuts that were included with the spacers ( do NOT use any other lugnuts as to the ones that were provided are made specifically for the spacer)
![Image]()
Torque them to 80lb
![Image]()
added the center core.
![Image]()
added the hub centric ring.
depending on what size youre running. (15mm or lower) you might have to grind off the excess stock studs since they will be interfering with your rims.
![Image]()
or if your rims have room like the one provided, you will not have to grind them.
![Image]()
if youre really going for an aggressive setup, you will have to roll your fenders if you are dropped also.
----
BEFORE
![Image]()
![Image]()
![Image]()
AFTER
![Image]()
![Image]()
![Image]()
Thanks for looking.
------------
04-22-09
Bought another set of Ichiba II spacers but they were 25mm, and was hooked up for $115 OTD.
I decided to take off the 20mm I put on the front and replace them with the 25mm I bought today and went ahead and put the 20mm in the rear.
![Image]()
![Image]()
![Image]()
![Image]()
the HUB ring thats integrated onto the spacer. STOCK SIZING (64.1)
![Image]()
comparison between 25mm and 20mm
![Image]()
Almost 1 inch... roughly
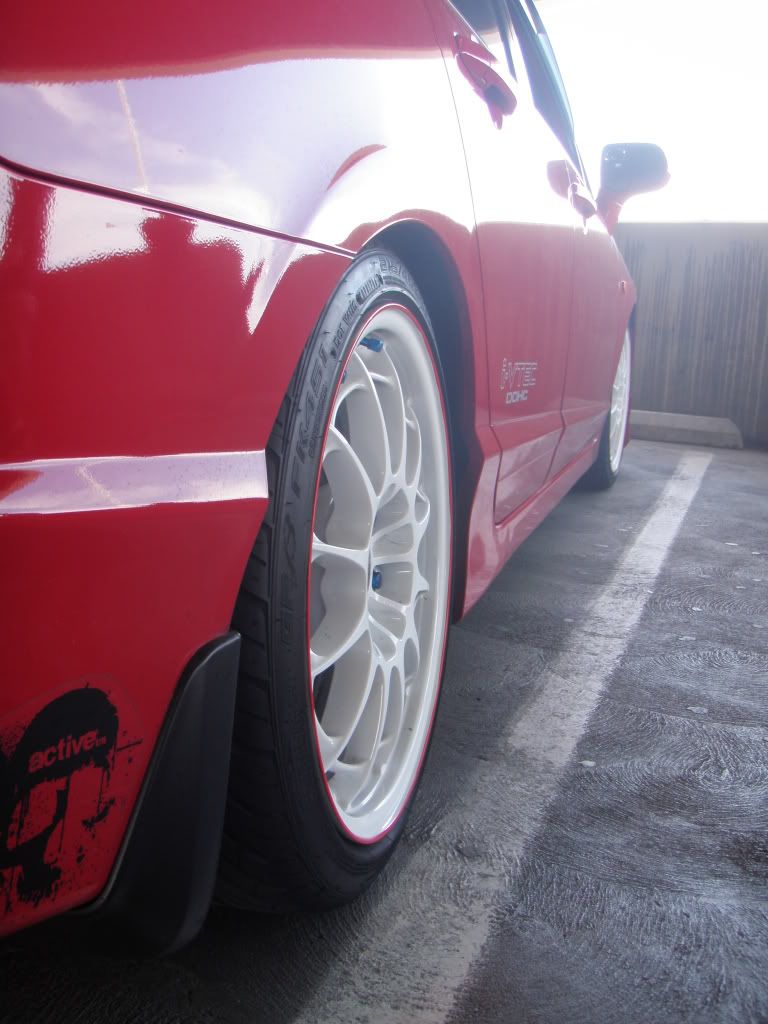
Fronts
Before (20mm)
![Image]()
After (25mm)
![Image]()
Rears
Before
![Image]()
![Image]()
After
![Image]()
![Image]()
Again Thanks again for looking.
People say that your wheel bearings will get damaged with spacers, that is true, same goes for people who are running aggressive wheel setups on their cars WITHOUT spacers. Our cars came with weak offsets for a reason, same goes with the mugen GPS or even HFP rims for our wheel bearings are designed for those kind of OEM rims.
Also putting wheel spacers on will be your last resort IF you cant find the right specs in rims you wanted (the one want that'll be aggressive) and wanting your wheels to look aggressive but do not have the extra money to sell your current rims.
and the other reason why ppl put them on is to clear out the inner wheel from hitting the struts (if running modified suspension) and also to clear brakes. (evos put them on the clear out their brembos)
The spacers I recommend are the ones that have studs pressed on them already and make sure the spacers you'll be getting have center cores (with the correct sizing you have for your rims, stock is 64.1mm) and as far as for brands I would go for Eibach(Germany), H & R(Germany), Ichiba II (JDM), or Project kics. but make sure they have a CENTER CORE! I cannot stress how important it'll be since theres already enough stress and the amount of friction going onto the studs, with the center core. Wheel spacers are very safe if they are torqued right and have enough threads on the studs. The studs are only in tensile force, not shear. The coefficient of friction between the wheel/spacer/hub is what transfers the power to the ground, not through the studs. As long as you can provide the adequate clamping force safely, the spacers will be perfectly safe.
Without further a due lets get started.
What is needed

-Pair of Spacers (I used 20mm Ichiba II)
-Center core 64.1mm (if spacers did not come with one, please get one for the model spacer you bought)
-Hub Centric Rings (I'm running Aftermarket rims, so I got 64.1mm to 72.62mm)
-Anti-Seize Lubricant (prevents corrosion and permits easy disassembling) Also do not go to Home Depot, which was closer to my house since they might not know what it is, and they do not have it
-Cross Wrench/torque wrench or whatever you use to tighten/untighten your lugnuts.
-Sand paper


What the pressed studded spacers look like with center cores and hubcentric rings


After you jacking up your car, and taking off the wheel. and you can see the rust.

Sand them down first.

and clean it afterwards

next you put the anti-seize lubricants on the studs.


next you put the lugnuts that were included with the spacers ( do NOT use any other lugnuts as to the ones that were provided are made specifically for the spacer)
Torque them to 80lb

added the center core.

added the hub centric ring.
depending on what size youre running. (15mm or lower) you might have to grind off the excess stock studs since they will be interfering with your rims.

or if your rims have room like the one provided, you will not have to grind them.

if youre really going for an aggressive setup, you will have to roll your fenders if you are dropped also.
----
BEFORE


AFTER


Thanks for looking.
------------
04-22-09
Bought another set of Ichiba II spacers but they were 25mm, and was hooked up for $115 OTD.
I decided to take off the 20mm I put on the front and replace them with the 25mm I bought today and went ahead and put the 20mm in the rear.


the HUB ring thats integrated onto the spacer. STOCK SIZING (64.1)

comparison between 25mm and 20mm
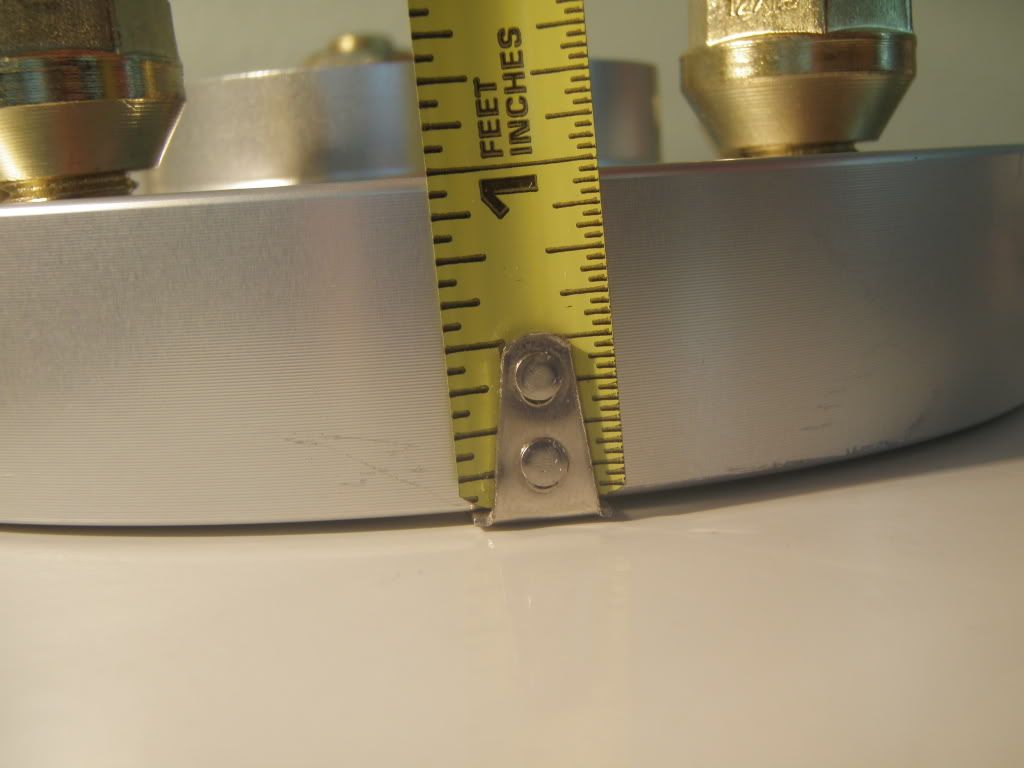
Almost 1 inch... roughly
Fronts
Before (20mm)
After (25mm)

Rears
Before

After


Again Thanks again for looking.


