

So heres a DIY for the Skunk2 Pro-S Coilovers. I was looking around for a DIY of these coilovers as its a bit more involved than installing the normal coilovers like Buddy Club's, Ksports, Tein's etc. but I couldn't find a decent one.. so I decided to snap a couple pictures while installing coilovers on one of my customer's cars and make one myself.
The tools I used were:
1/2" drive 14mm, 17mm
3/8" drive 14mm
14mm wrench
14mm Ratcheting wrench
Vice grip
Allen key
Flathead
Stock lug nut remover bar
Magnetic handle for screwdriver bits
Electric impact gun
Note: some of these tools were NOT necessary, I just use which ever tools I have in my possession that will get the work done.
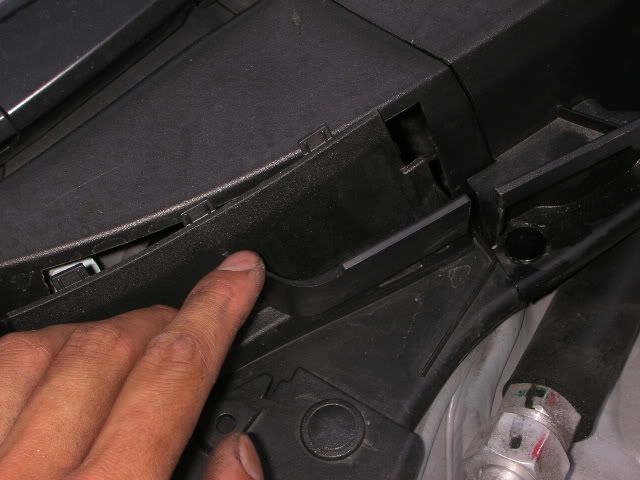
I started off by removing the cover under the hood that gives access to the top bolts that hold the damper in place.
![Image]()
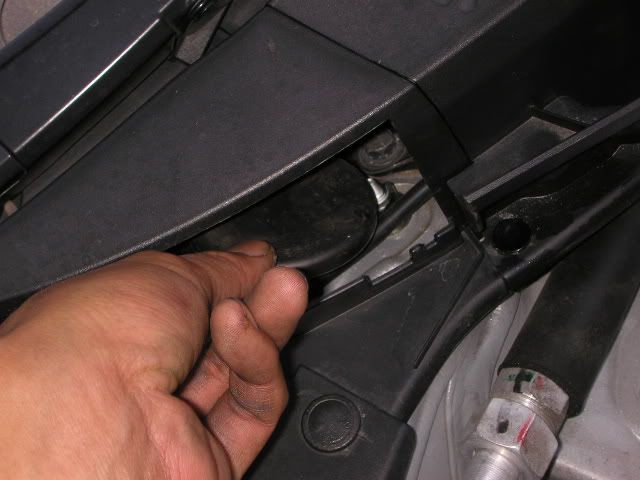
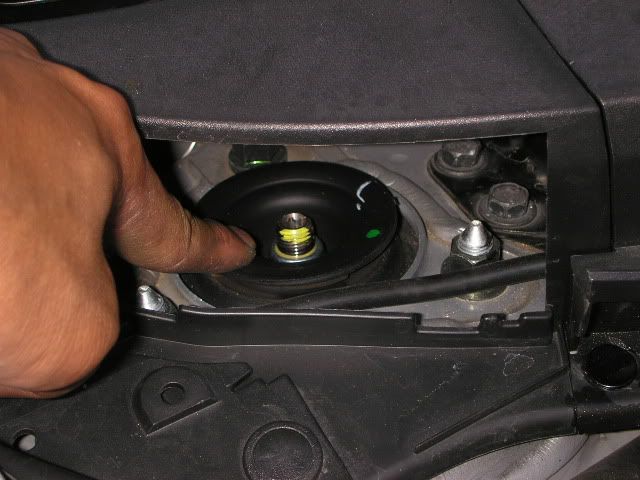
I then removed the cap that covers the 17mm tophat nut
![Image]()
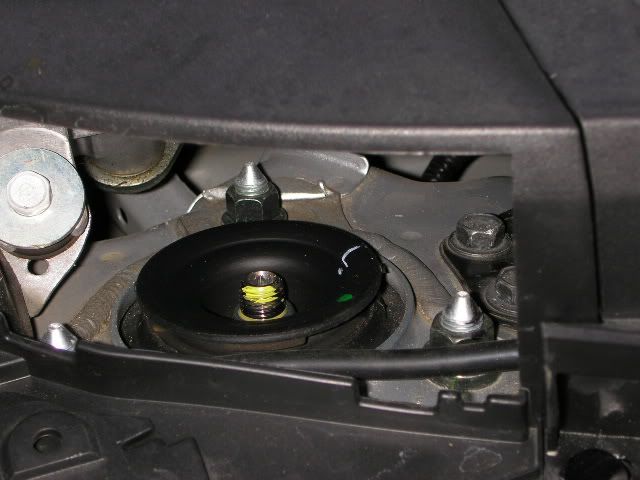
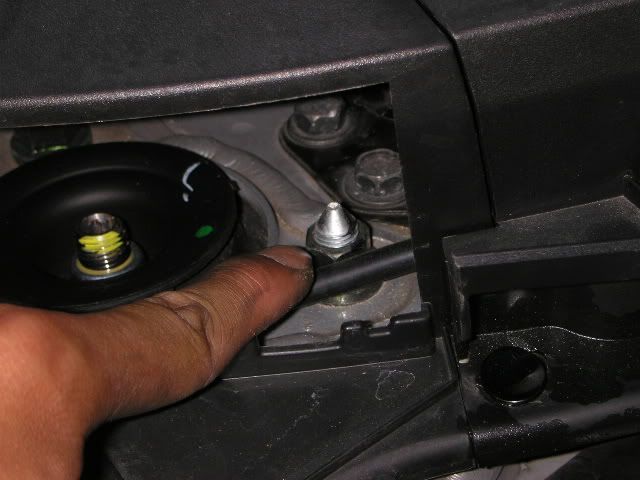
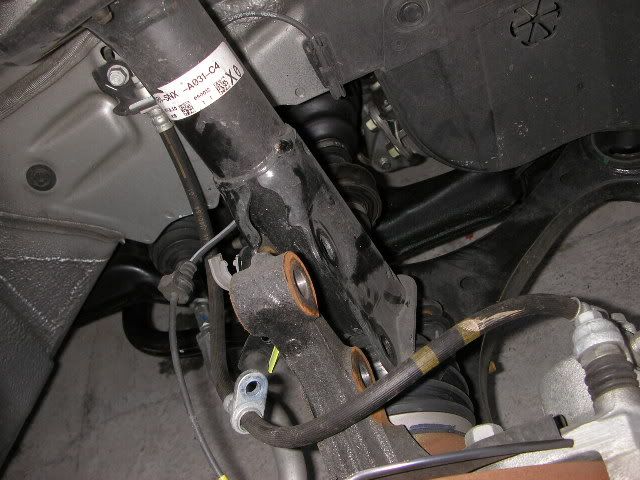
Here you can see the 3 bolts you need to remove
![Image]()
![Image]()
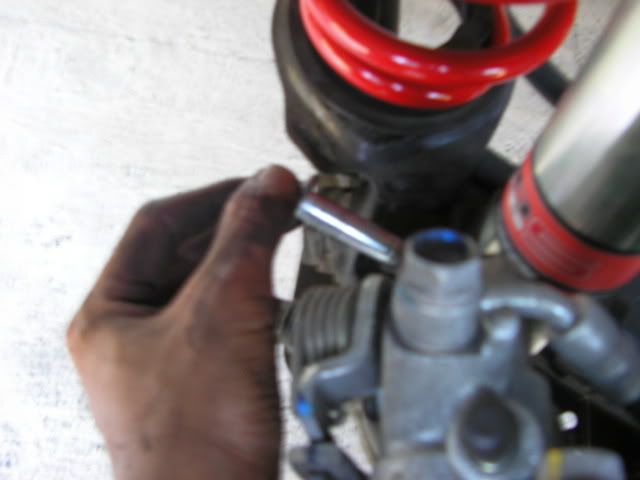
Remove it with your 3/8" drive ratchet and a 14mm socket
![Image]()
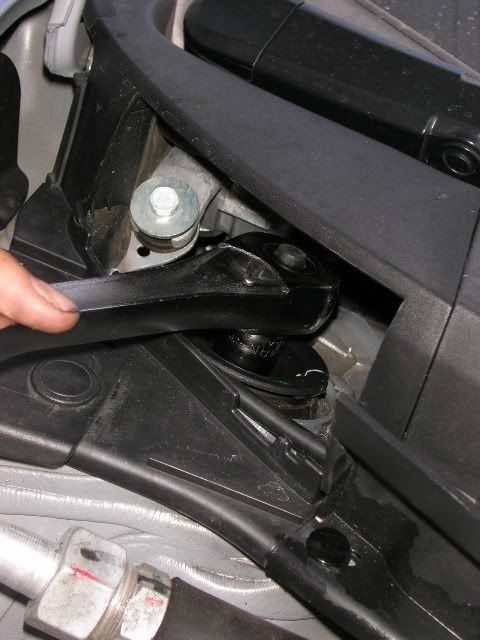
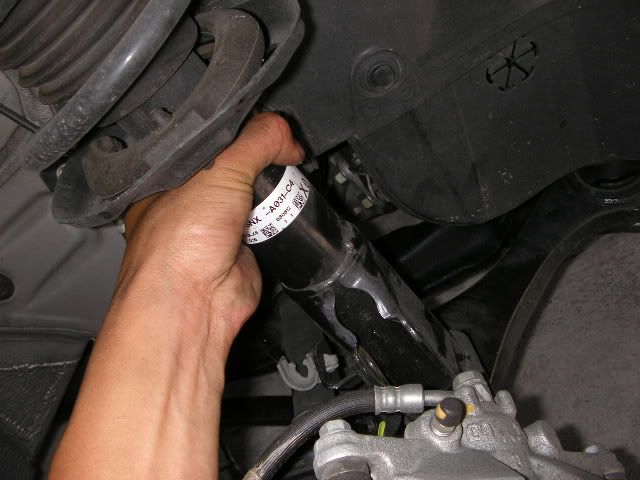
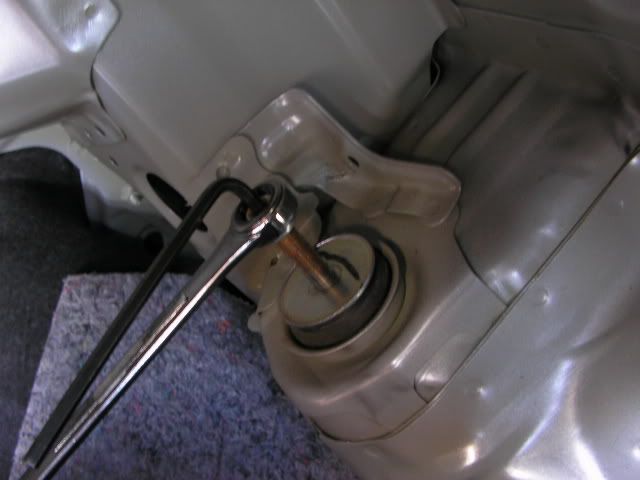
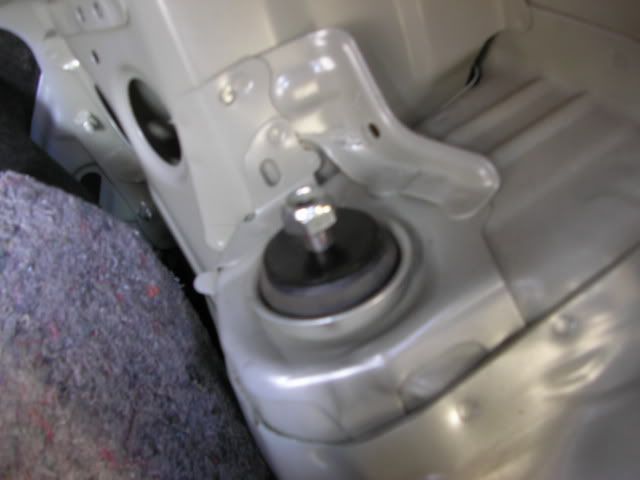
Heres the tophat nut that you need to break loose.. as in LOOSEN IT, don't remove it.
![Image]()
Use a 1/2" drive ratchet and 17mm socket. (Note, the driver side might not want to break loose, just keep at it and eventually it will)
![Image]()
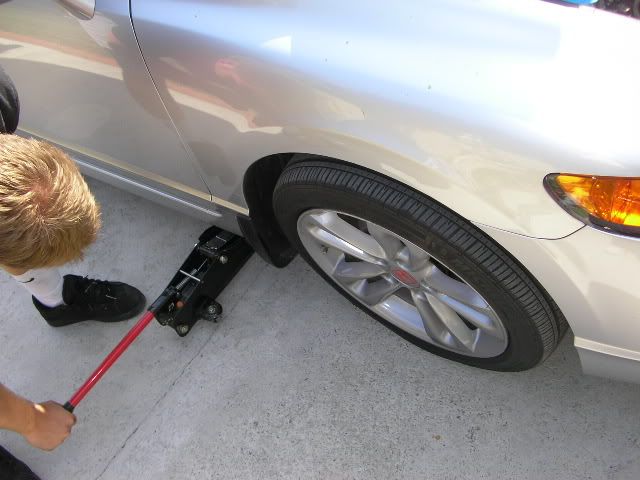
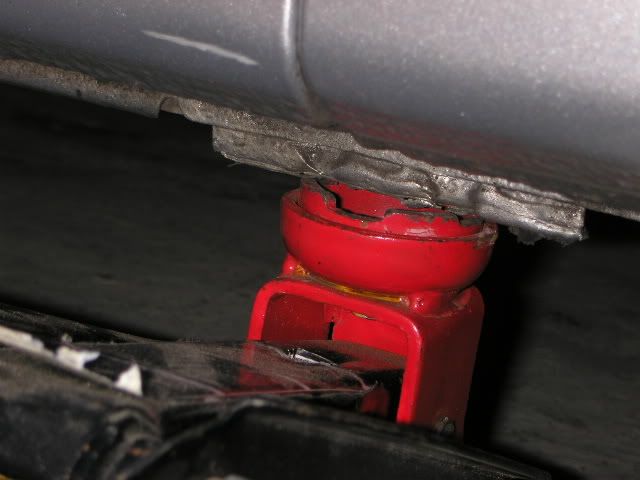
I then jacked up the car at its correct jack points.
![Image]()
![Image]()
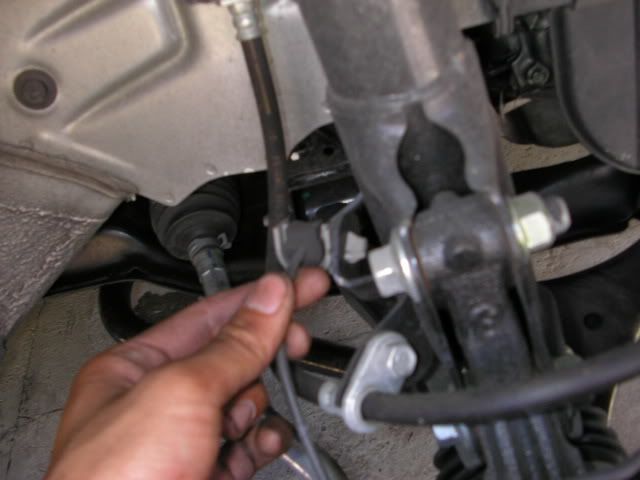
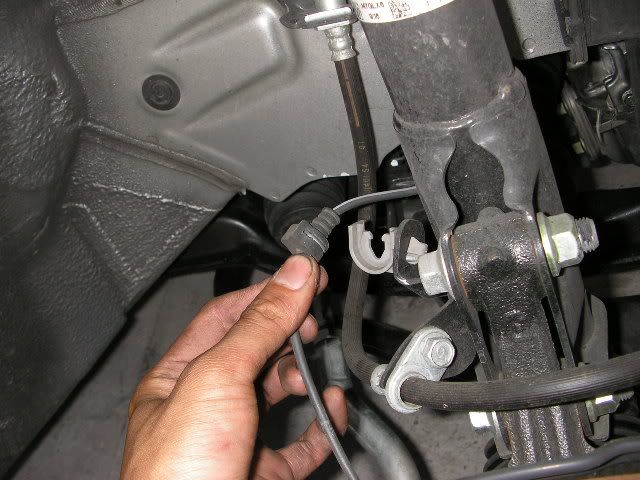
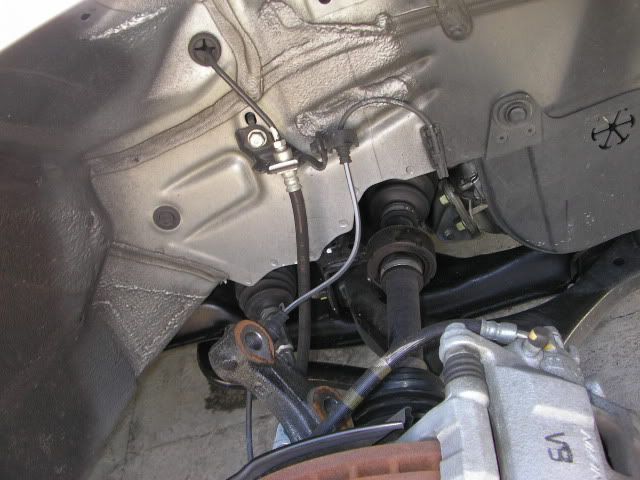
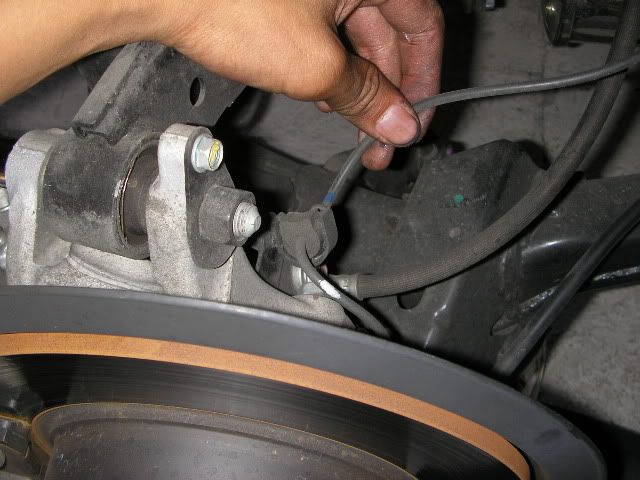
Remove the ABS line from the holder
![Image]()
![Image]()
Use a 10mm to remove the bolt that holds the brake line onto the shock
![Image]()
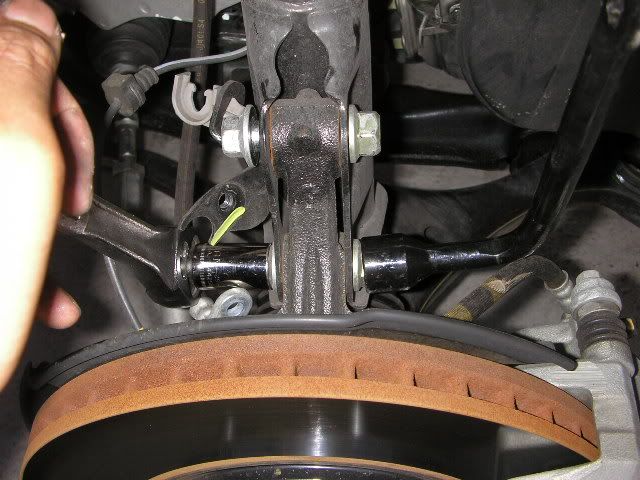
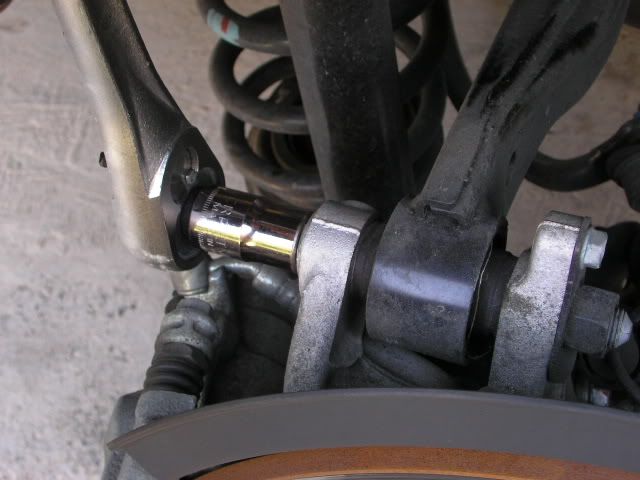
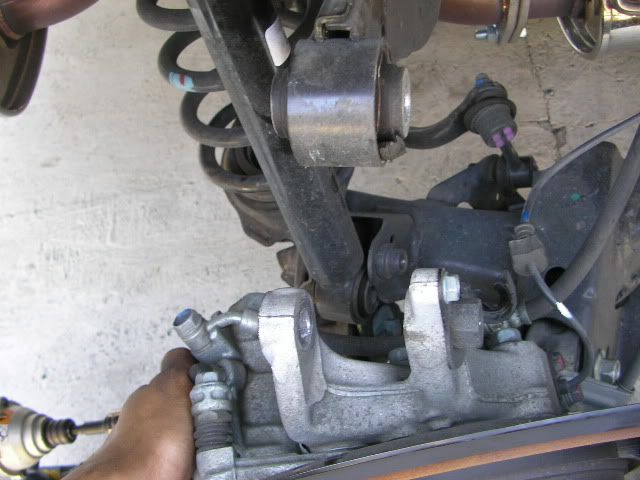
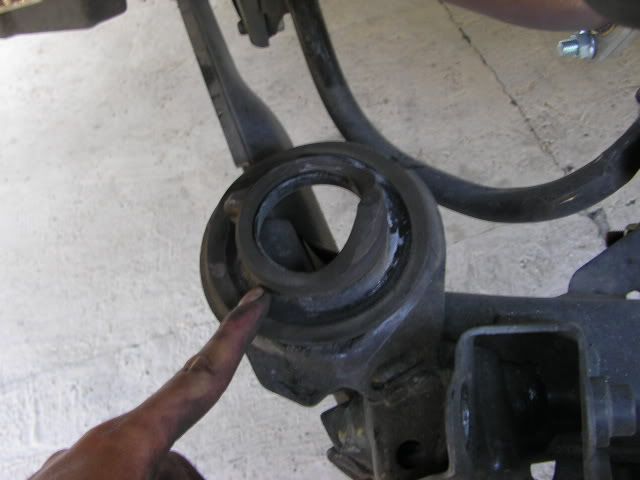
I used a car lugnut remover for the camber bolt since its also a 19mm.. you don't have to use it though. I used it to loosen the bolt.
![Image]()
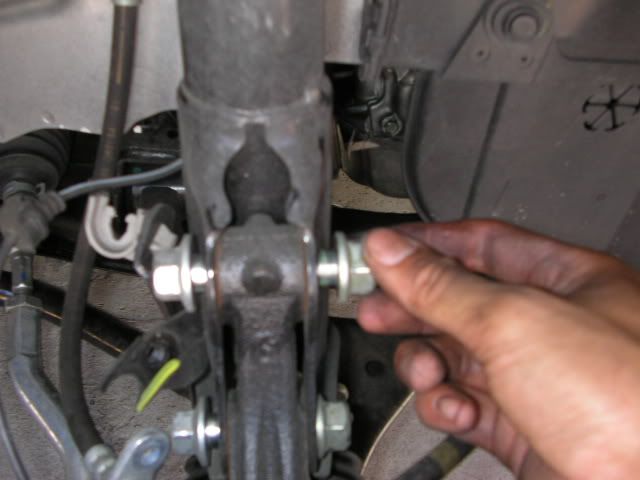
Now put the 17mm ratchet on the other end and twist off the nut
![Image]()
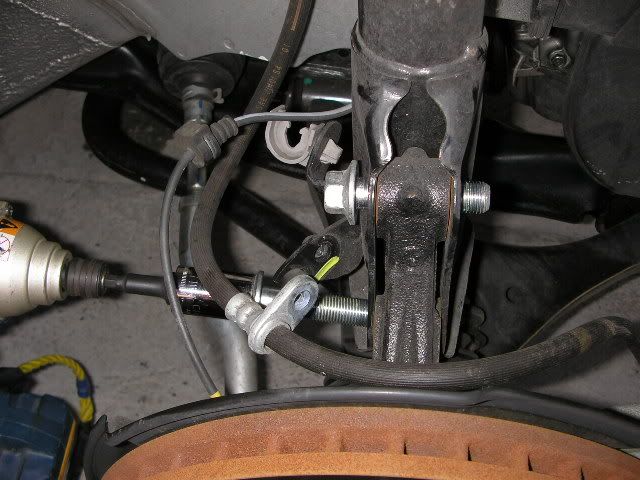
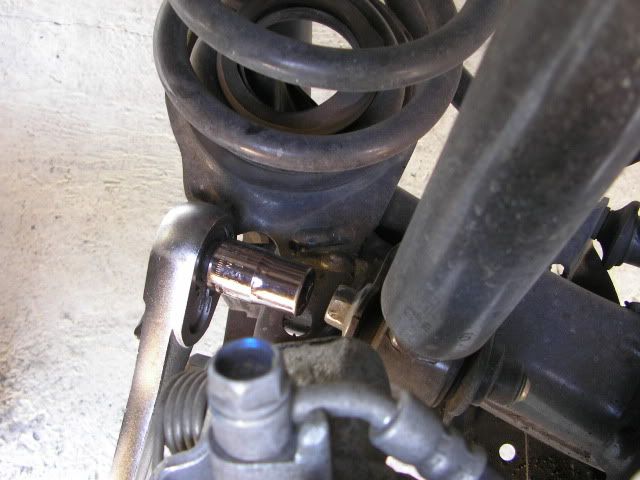
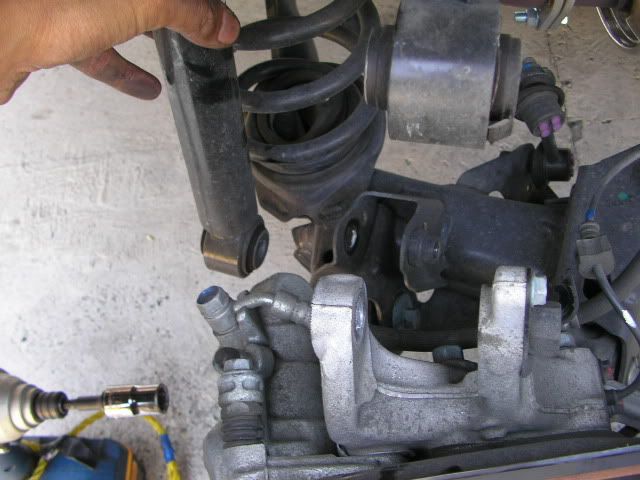
Same with the bottom one
![Image]()
![Image]()
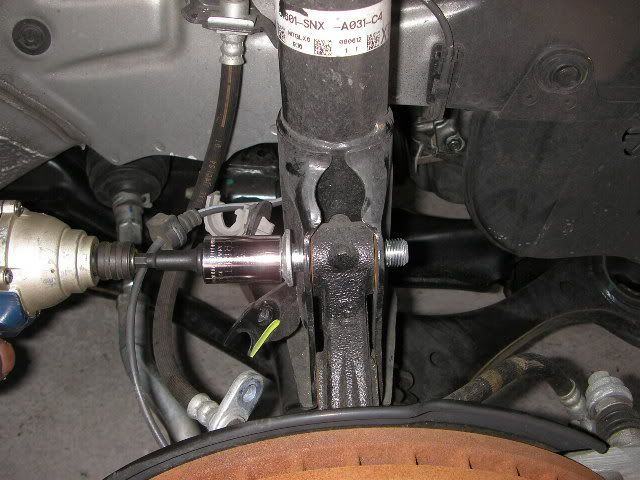
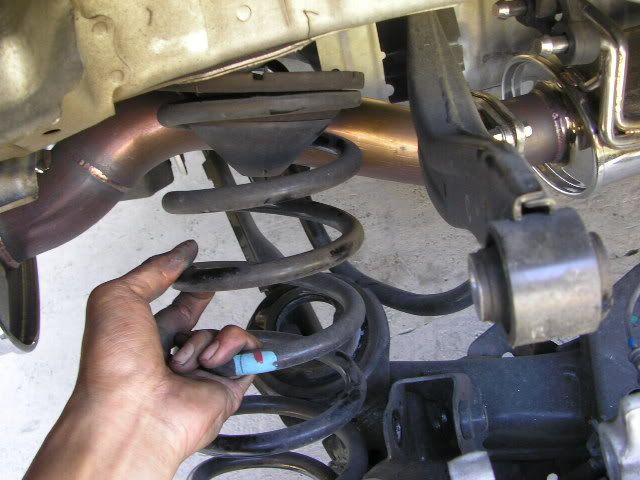
I used my electric impact gun to remove the camber bolts from the assembly, it seems to come off easier with a gun.
![Image]()
![Image]()
Here's what it looks like when the shock assembly is not attached to anything anymore.
![Image]()
Remove the three bolts on top of the shock that you loosened earlier and pull off the stock shock
![Image]()
![Image]()
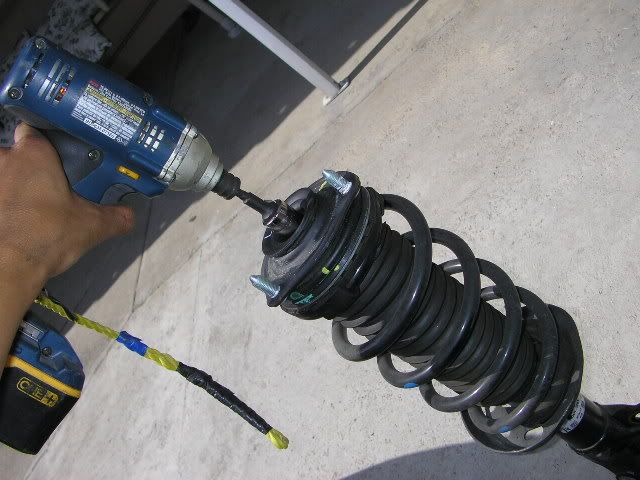
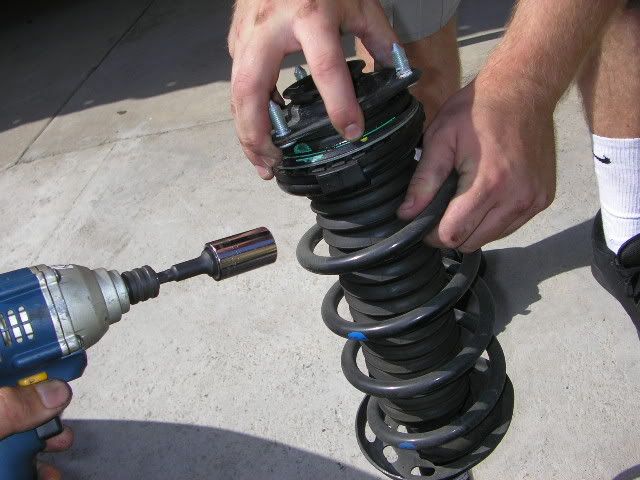
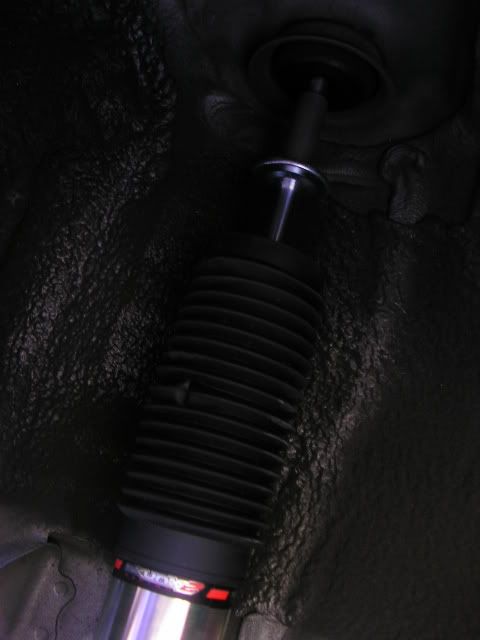
I used my electric impact gun to remove the top bolt from the top hat NO SPRING COMPRESSOR NECESSARY
![Image]()
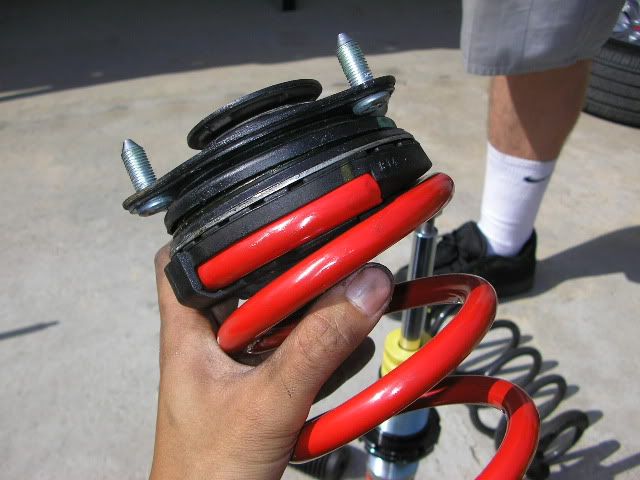
Now with the bolt off, remove the top hat while holding the spring (CRITICAL, If you don't hold the spring while removing the top hat then you might drop all the bearings from the top hat.)
![Image]()
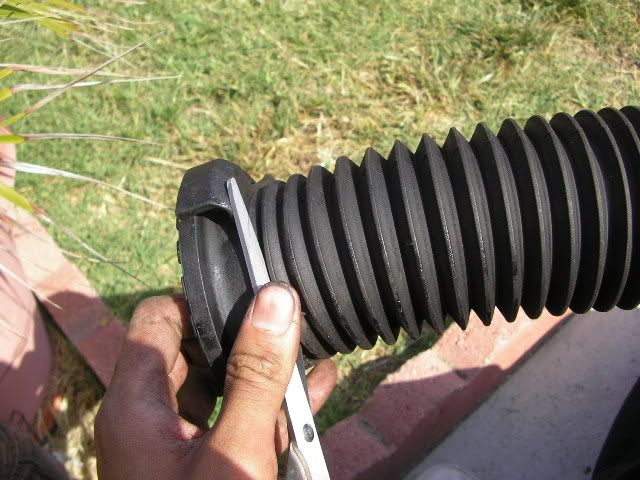
Remove the dust boot from the top hat and spring and cut the boot off
![Image]()
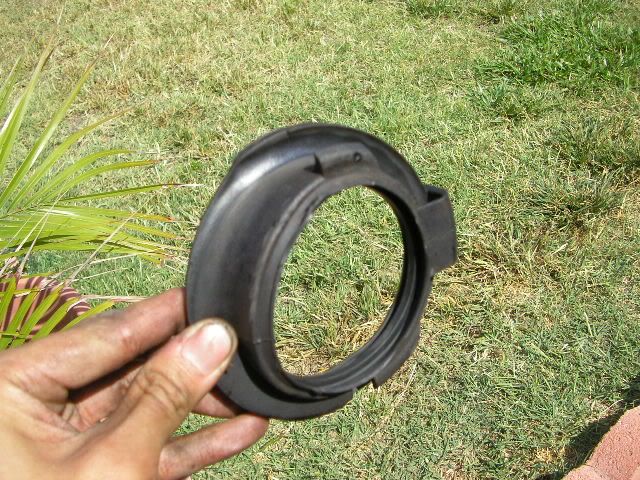
Here's what it looks like w/o the boot
![Image]()
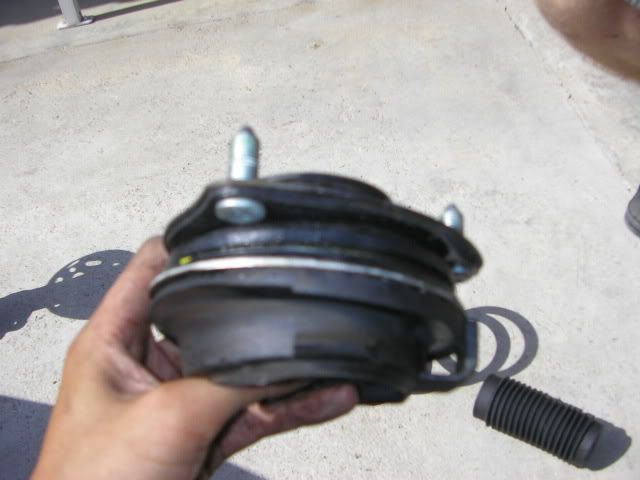
Snap it back onto the top hat
![Image]()
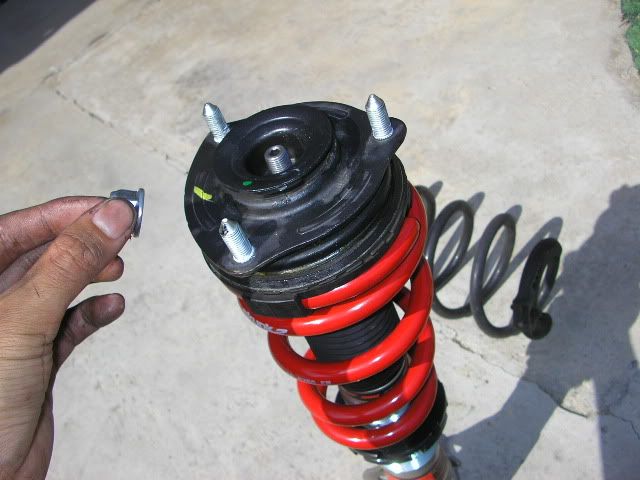
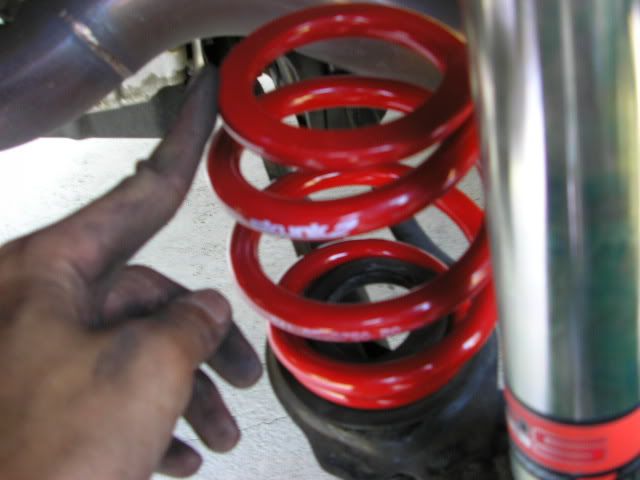
Put the spring onto the top hat
![Image]()
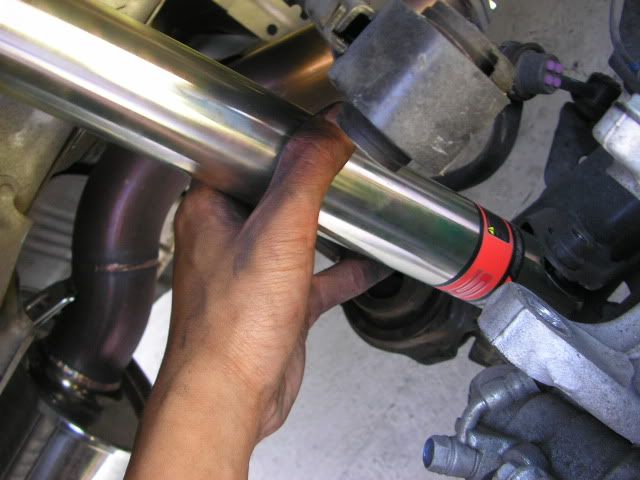
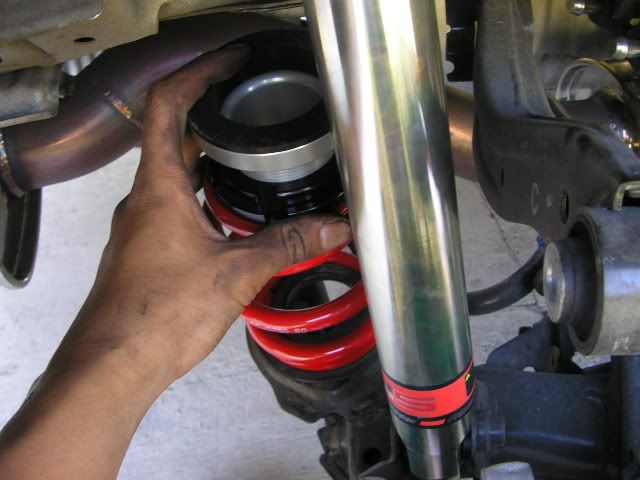
Put everything back into the shock (remember to adjust the height on both sides with the black rings so they are both even before putting it back into the car)
![Image]()
![Image]()
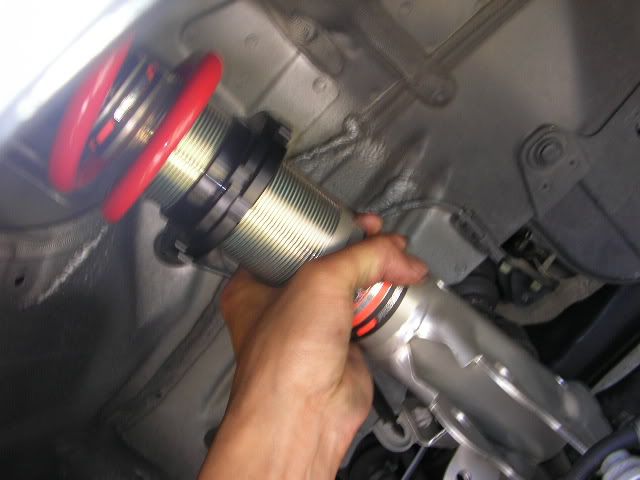
Put the Coilover back into the car
![Image]()
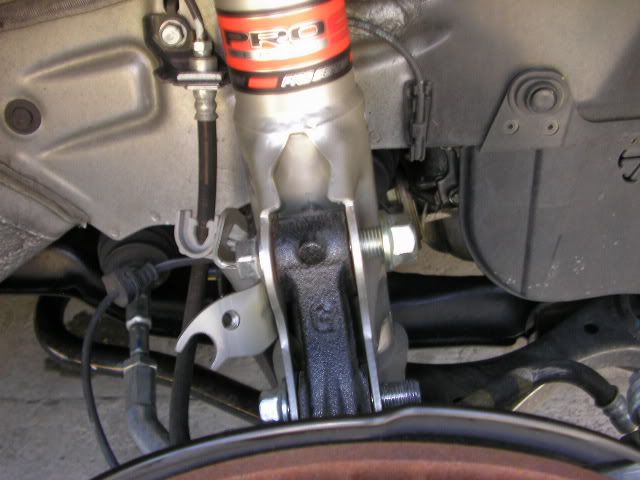
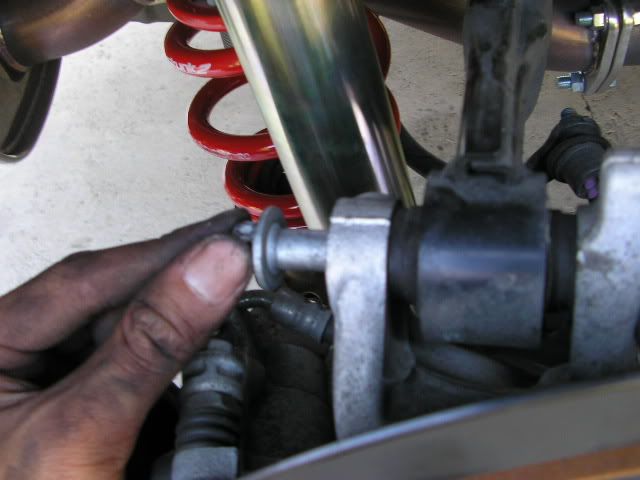
Put back the camber bolt on and everything else that needs to be put on.
![Image]()
(Note: I forgot to take pictures of removing the ABS clip from the stock damper to the coilover, but its easy to remove with a flathead)
Now your done with the front.
Now for the rear you start by removing the ABS line.
![Image]()
Remove the long bolt that holds the camber arm onto the rotor/brake assembly. (Use a 1/2" drive 14mm for this one. Sometimes they are hard to come off)
![Image]()
Remove the 14mm bolt that holds the bottom of the damper.
![Image]()
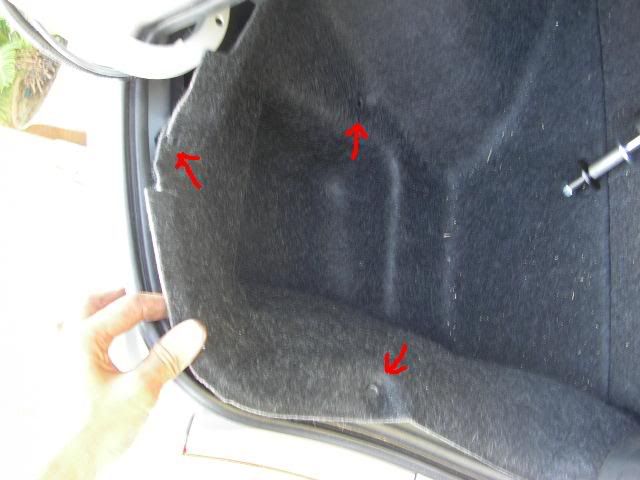
Remove the 3 clips from the trunk liner. You need a flathead for this.
![Image]()
Now that the trunk liner is removed you will be able to access the top of the damper thats held on but a nut. You need a 14mm ratcheting wrench and a allen key for this. I used a 14mm solid wrench to break loose the bolt since ratcheting wrenches tend to break if the nut is screwed on tight.
![Image]()
Here is the view when both bolts are removed from the bottom of the car
![Image]()
Pull out the damper
![Image]()
Pull out the spring while someone steps on the rotor. It takes a little bit of effort
![Image]()
Keep the rubber piece on the bottom of the spring section. You'll need that.
![Image]()
Take the damper and insert it up where you removed the old damper
![Image]()
![Image]()
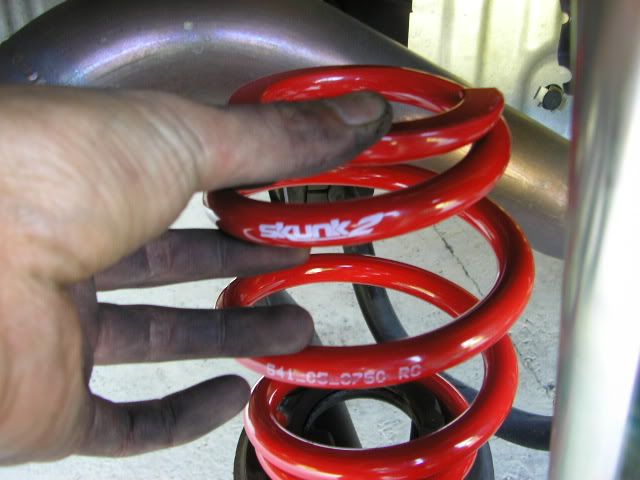
Put in the spring like so. (notice the letters are not upside down, some people installed the spring incorrectly)
![Image]()
![Image]()
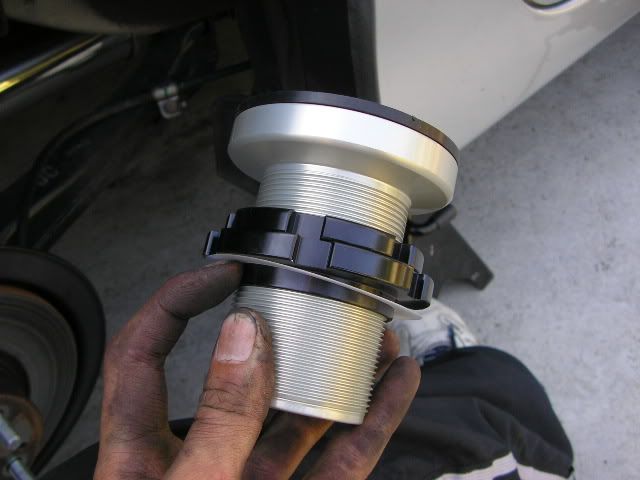
Take the top perch and set the height for both sides. Don't forget the plastic washer.
![Image]()
![Image]()
Put back the bolts
![Image]()
![Image]()
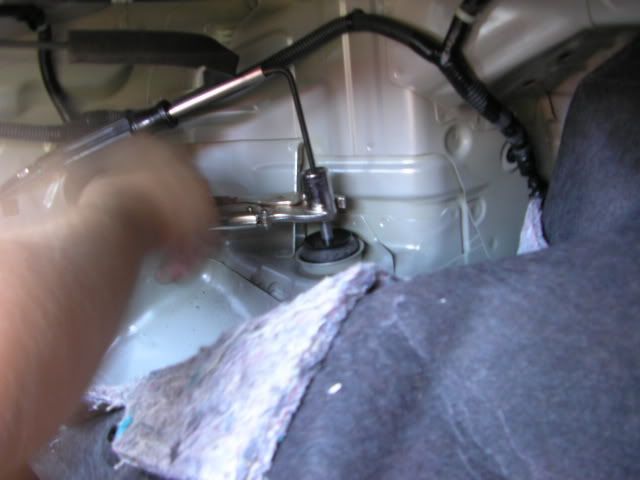
Screw the nut on top of the damper while the car is ON THE GROUND.
![Image]()
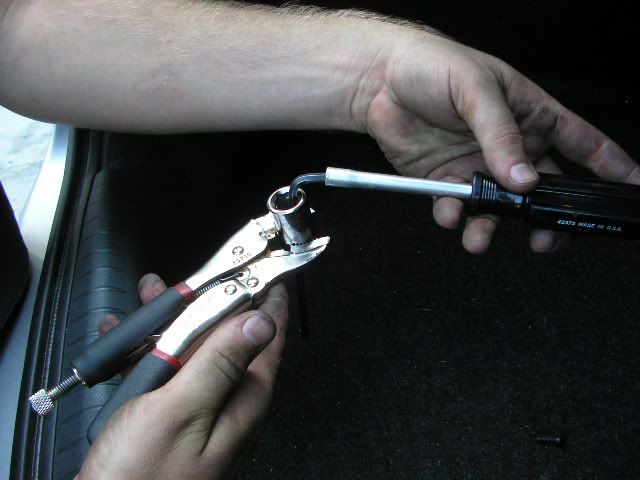
The nut they provided is a 17mm nut. I didn't have a 17mm ratcheting wrench so I had to improvise, like so. You can do this anyway you want, as long as your able to tighten the nut down as much as possible.
![Image]()
![Image]()
Make sure all the bolts are tightened down tightly and place the ABS lines back onto the clip and there you go, Install complete. :cheerleader: :clapping: :woowoo:
The tools I used were:
1/2" drive 14mm, 17mm
3/8" drive 14mm
14mm wrench
14mm Ratcheting wrench
Vice grip
Allen key
Flathead
Stock lug nut remover bar
Magnetic handle for screwdriver bits
Electric impact gun
Note: some of these tools were NOT necessary, I just use which ever tools I have in my possession that will get the work done.
I started off by removing the cover under the hood that gives access to the top bolts that hold the damper in place.
I then removed the cap that covers the 17mm tophat nut
Here you can see the 3 bolts you need to remove
Remove it with your 3/8" drive ratchet and a 14mm socket

Heres the tophat nut that you need to break loose.. as in LOOSEN IT, don't remove it.
Use a 1/2" drive ratchet and 17mm socket. (Note, the driver side might not want to break loose, just keep at it and eventually it will)
I then jacked up the car at its correct jack points.
Remove the ABS line from the holder
Use a 10mm to remove the bolt that holds the brake line onto the shock
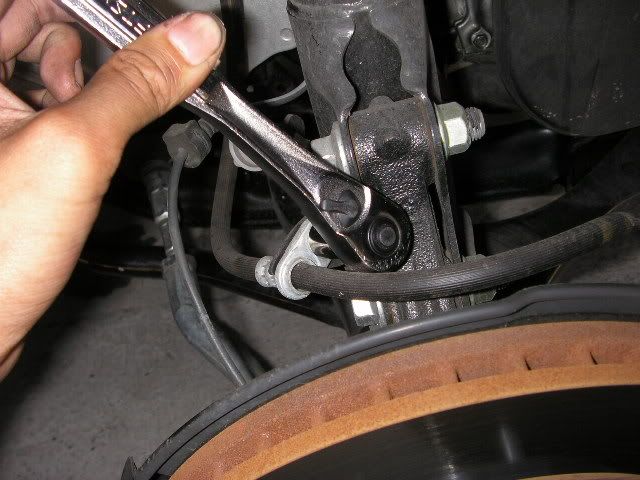
I used a car lugnut remover for the camber bolt since its also a 19mm.. you don't have to use it though. I used it to loosen the bolt.

Now put the 17mm ratchet on the other end and twist off the nut
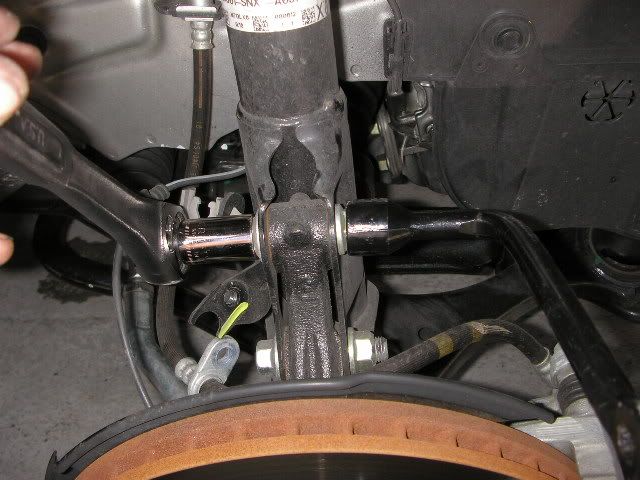
Same with the bottom one
I used my electric impact gun to remove the camber bolts from the assembly, it seems to come off easier with a gun.
Here's what it looks like when the shock assembly is not attached to anything anymore.
Remove the three bolts on top of the shock that you loosened earlier and pull off the stock shock
I used my electric impact gun to remove the top bolt from the top hat NO SPRING COMPRESSOR NECESSARY
Now with the bolt off, remove the top hat while holding the spring (CRITICAL, If you don't hold the spring while removing the top hat then you might drop all the bearings from the top hat.)
Remove the dust boot from the top hat and spring and cut the boot off
Here's what it looks like w/o the boot
Snap it back onto the top hat
Put the spring onto the top hat
Put everything back into the shock (remember to adjust the height on both sides with the black rings so they are both even before putting it back into the car)

Put the Coilover back into the car
Put back the camber bolt on and everything else that needs to be put on.
(Note: I forgot to take pictures of removing the ABS clip from the stock damper to the coilover, but its easy to remove with a flathead)
Now your done with the front.
Now for the rear you start by removing the ABS line.
Remove the long bolt that holds the camber arm onto the rotor/brake assembly. (Use a 1/2" drive 14mm for this one. Sometimes they are hard to come off)
Remove the 14mm bolt that holds the bottom of the damper.
Remove the 3 clips from the trunk liner. You need a flathead for this.
Now that the trunk liner is removed you will be able to access the top of the damper thats held on but a nut. You need a 14mm ratcheting wrench and a allen key for this. I used a 14mm solid wrench to break loose the bolt since ratcheting wrenches tend to break if the nut is screwed on tight.
Here is the view when both bolts are removed from the bottom of the car
Pull out the damper
Pull out the spring while someone steps on the rotor. It takes a little bit of effort
Keep the rubber piece on the bottom of the spring section. You'll need that.
Take the damper and insert it up where you removed the old damper
Put in the spring like so. (notice the letters are not upside down, some people installed the spring incorrectly)
Take the top perch and set the height for both sides. Don't forget the plastic washer.
Put back the bolts
Screw the nut on top of the damper while the car is ON THE GROUND.
The nut they provided is a 17mm nut. I didn't have a 17mm ratcheting wrench so I had to improvise, like so. You can do this anyway you want, as long as your able to tighten the nut down as much as possible.
Make sure all the bolts are tightened down tightly and place the ABS lines back onto the clip and there you go, Install complete. :cheerleader: :clapping: :woowoo:
 at:
at:

