

I was getting ready to order Speed Bleeders for my Si and my ’05 CR-V (I’ve used them on a previous car and loved them) when I realized I couldn’t find a full DIY for bleeding the brakes and clutch on 8th Civic so it became my patriotic duty to take some pictures and assemble a DIY for the folks that want to flush out their old fluid with new or have opened up their system to replace a caliper or install stainless lines, etc. Hopefully you’ll find it useful!
Special thanks goes out to Collin (07_HFP_Si) for taking pictures while we did the install on his car (we installed his new header at the same time) as well as Michael at Speed Bleeder Products, Inc. for excellent customer service. Michael was quick to respond to my sizing questions and when I finally placed my order late in the afternoon on a Friday (Pacific Time) I received an e-mail that they had shipped on Saturday and they were in my mail box on Monday morning! Not bad considering these guys are located near Chicago!
To get started you’ll need the following:
-Solid jack and jack stands (Or other safe means to lift and support your car).
-Plastic syringe (available at medical supply stores) or other way to suck old fluid out of the reservoir.
-2’-3’ of 1/4” silicone tubing (standard aquarium tubing will work but just isn’t as nearly as easy to use). I just ordered the tubing they offer at Speed Bleeder Products, Inc Bleeder Hose and it worked better than even silicone aquarium tubing.
-10 mm wrench
-10 mm socket and ratchet (optional)
-8 mm wrench (for clutch bleed bolt)
-Torque wrench
-Bottle to catch brake fluid or better yet, use the bleeder bag Speed Bleeder Products, Inc Bleeder Bag. For $3 it makes things a whole lot cleaner.
-Four SB10125 Speed Bleeders Speed Bleeder Products, Inc SB10125 Speed Bleeder ($28).
-One SB8125L Speed Bleeder for the clutch Speed Bleeder Products, Inc SB8125L Speed Bleeder ($7).
-Approximately 1 quart (2 pints) of your favorite DOT 3 or DOT 4 brake fluid. Be sure to use fresh, sealed containers of brake fluid!
-Rubber mallet
-Shop rags or paper towels
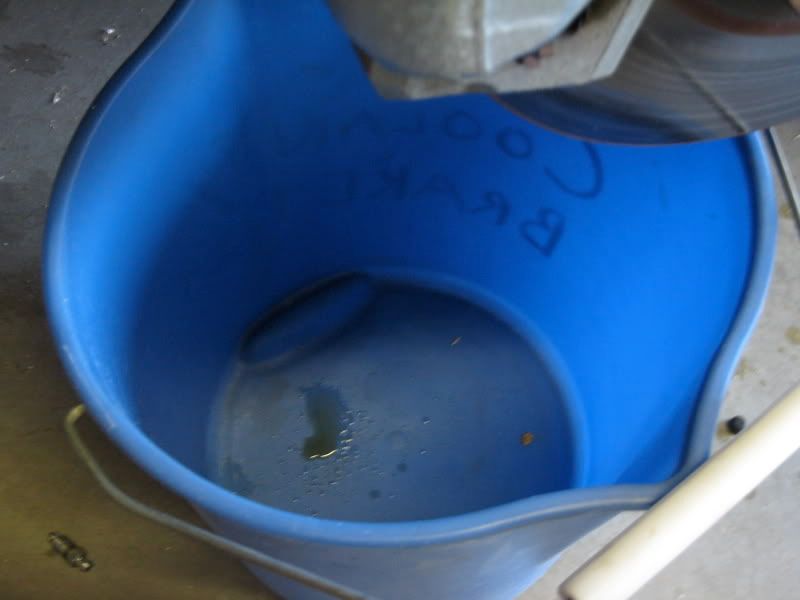
-Bucket
![Image]()
1. Start with pumping the brake pedal a dozen or so times until all of the vacuum is out of the booster (pedal is completely hard) and then lift your car up off of the ground and remove the wheels.
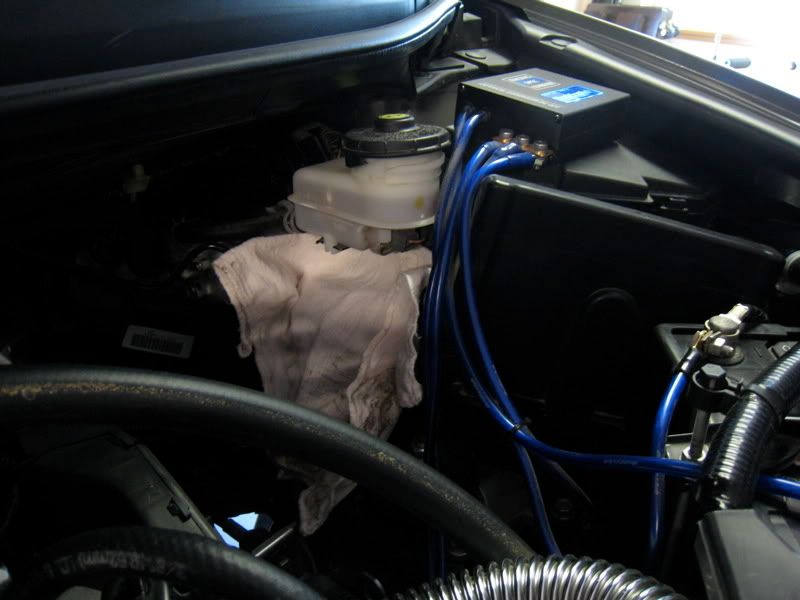
2. Pop the hood and lay some rags beneath the brake fluid reservoir to catch any spilled brake fluid.
Note: Brake fluid will harm your paint! If you spill any you will want to wipe it up ASAP and be sure to rinse the area with lots of water once you get everything sealed back up!
![Image]()
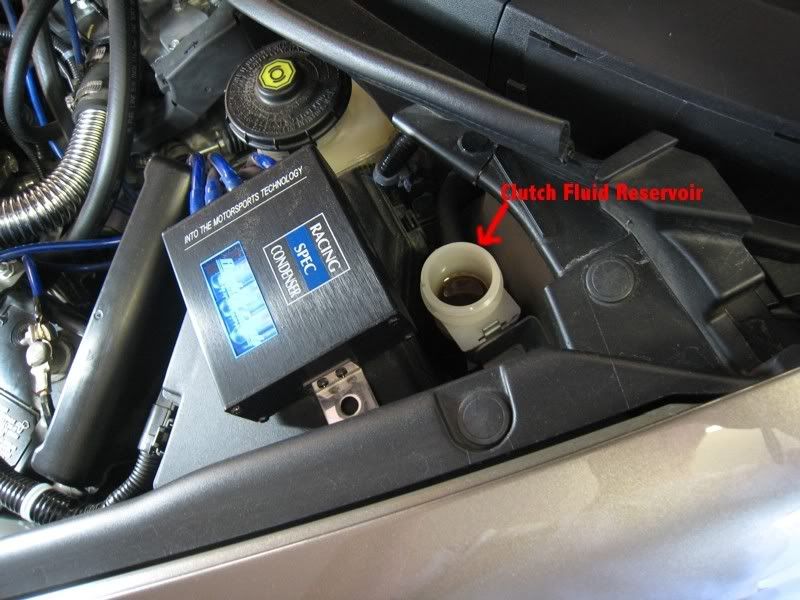
3. Remove the brake fluid reservoir cap and then the white strainer within the reservoir to expose the fluid. Clean these components if needed.
![Image]()
4. Using a plastic syringe with a few inches of silicone tubing on the end of it. draw out the fluid in the reservoir. Stir up the sediment with the end of the tubing and then suck it all out. Once all of the old fluid is out, fill the reservoir to the “MAX” or upper line with fresh fluid.
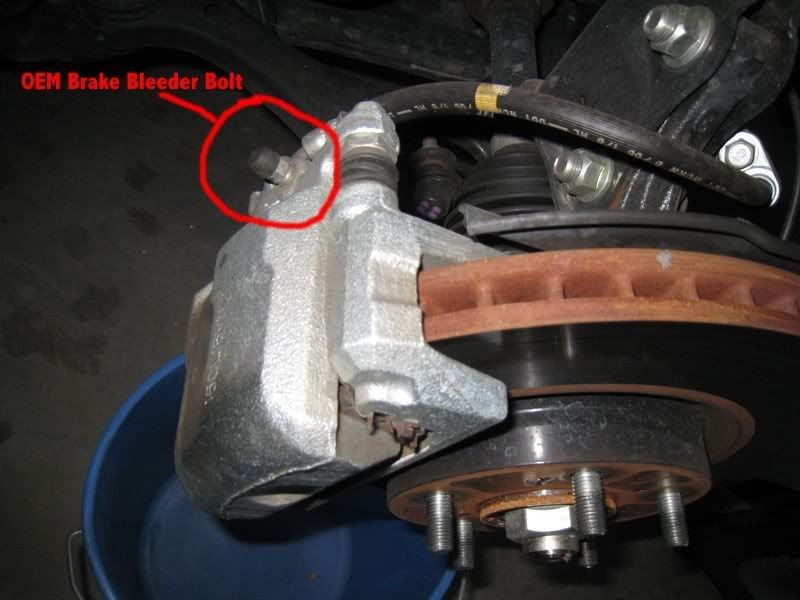
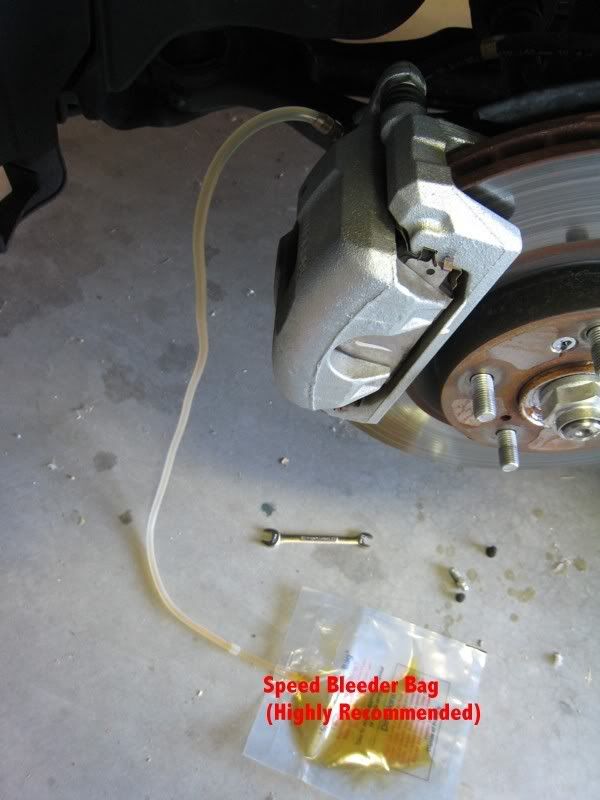
5. Starting with the driver’s side front wheel, place a bucket underneath the caliper and remove the rubber dust cap from the bleeder bolt and then use your 10 mm socket or wrench to loosen and remove the bleeder bolt from the caliper. A small amount of fluid will likely drip out of the open hold in the caliper.
![Image]()
![Image]()
![Image]()
![Image]()
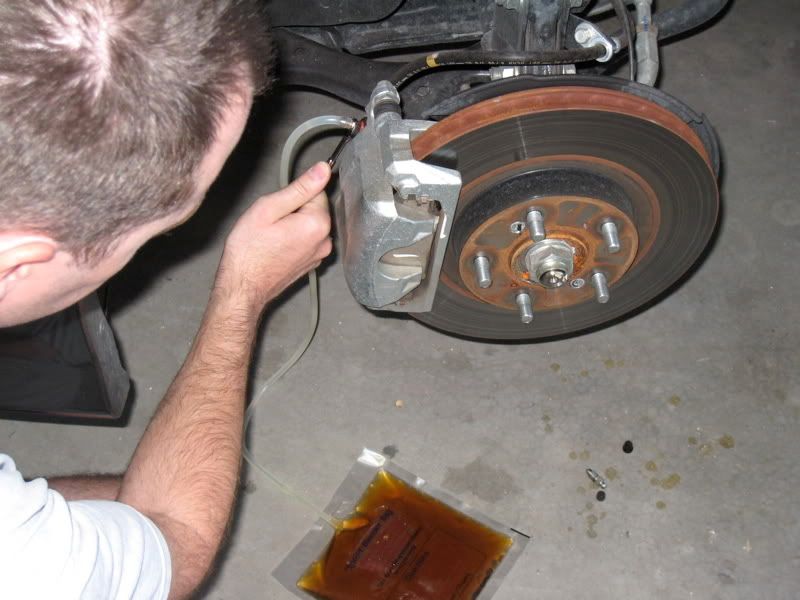
6. Thread your new Speed Bleeder into the caliper hole and torque to 7 lbf-ft. Slip one end of silicone tubing over the bleeder nipple and slip the other end on the bleeder bag or in your catch bottle. Using your 10 mm wrench, open the Speed Bleeder ¼ - ½ turn. Now begin pumping your brake pedal until new fluid is visible in the tubing making sure that the fluid level in the reservoir does not get below the MIN (lower line) marking. If you go below the MIN mark and air enters the braking system you will need to fill the reservoir and bleed the line until the air that entered the system has been flushed completely through and comes out of the caliper.
Special thanks goes out to Collin (07_HFP_Si) for taking pictures while we did the install on his car (we installed his new header at the same time) as well as Michael at Speed Bleeder Products, Inc. for excellent customer service. Michael was quick to respond to my sizing questions and when I finally placed my order late in the afternoon on a Friday (Pacific Time) I received an e-mail that they had shipped on Saturday and they were in my mail box on Monday morning! Not bad considering these guys are located near Chicago!
To get started you’ll need the following:
-Solid jack and jack stands (Or other safe means to lift and support your car).
-Plastic syringe (available at medical supply stores) or other way to suck old fluid out of the reservoir.
-2’-3’ of 1/4” silicone tubing (standard aquarium tubing will work but just isn’t as nearly as easy to use). I just ordered the tubing they offer at Speed Bleeder Products, Inc Bleeder Hose and it worked better than even silicone aquarium tubing.
-10 mm wrench
-10 mm socket and ratchet (optional)
-8 mm wrench (for clutch bleed bolt)
-Torque wrench
-Bottle to catch brake fluid or better yet, use the bleeder bag Speed Bleeder Products, Inc Bleeder Bag. For $3 it makes things a whole lot cleaner.
-Four SB10125 Speed Bleeders Speed Bleeder Products, Inc SB10125 Speed Bleeder ($28).
-One SB8125L Speed Bleeder for the clutch Speed Bleeder Products, Inc SB8125L Speed Bleeder ($7).
-Approximately 1 quart (2 pints) of your favorite DOT 3 or DOT 4 brake fluid. Be sure to use fresh, sealed containers of brake fluid!
-Rubber mallet
-Shop rags or paper towels
-Bucket

1. Start with pumping the brake pedal a dozen or so times until all of the vacuum is out of the booster (pedal is completely hard) and then lift your car up off of the ground and remove the wheels.
2. Pop the hood and lay some rags beneath the brake fluid reservoir to catch any spilled brake fluid.
Note: Brake fluid will harm your paint! If you spill any you will want to wipe it up ASAP and be sure to rinse the area with lots of water once you get everything sealed back up!
3. Remove the brake fluid reservoir cap and then the white strainer within the reservoir to expose the fluid. Clean these components if needed.
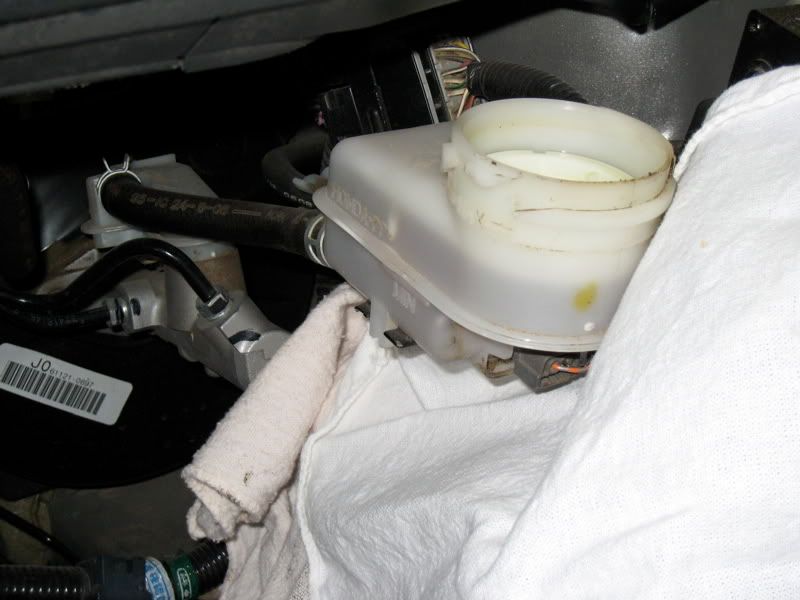
4. Using a plastic syringe with a few inches of silicone tubing on the end of it. draw out the fluid in the reservoir. Stir up the sediment with the end of the tubing and then suck it all out. Once all of the old fluid is out, fill the reservoir to the “MAX” or upper line with fresh fluid.
5. Starting with the driver’s side front wheel, place a bucket underneath the caliper and remove the rubber dust cap from the bleeder bolt and then use your 10 mm socket or wrench to loosen and remove the bleeder bolt from the caliper. A small amount of fluid will likely drip out of the open hold in the caliper.
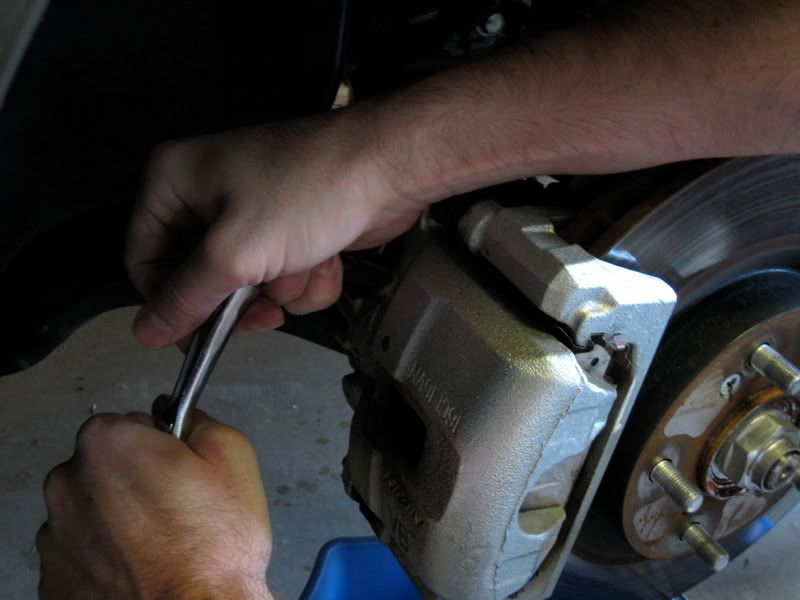

6. Thread your new Speed Bleeder into the caliper hole and torque to 7 lbf-ft. Slip one end of silicone tubing over the bleeder nipple and slip the other end on the bleeder bag or in your catch bottle. Using your 10 mm wrench, open the Speed Bleeder ¼ - ½ turn. Now begin pumping your brake pedal until new fluid is visible in the tubing making sure that the fluid level in the reservoir does not get below the MIN (lower line) marking. If you go below the MIN mark and air enters the braking system you will need to fill the reservoir and bleed the line until the air that entered the system has been flushed completely through and comes out of the caliper.


 aper:
aper:


